Tuesday, February 25, 2014

Baking Birthday Party!

I have been away!  Not literally, just from the blog!  I apologize,  I did something to my back that has kept me from a lot of things such as blogging and last week I had a few deadlines I had to meet with different things so It's been a while since I've sat here and typed.  

Ok so I get so busy with projects and such that I have forgotten to share this fun Birthday Party with you that I did over 3 years ago.  At the time, I didn't even have a blog yet, but I did take some pictures to share with you!
    

This was such a fun party.   I did this one for Madi, mainly as a huge thank you to her.  She was such a help to me at this time in my life.  I had the two little ones who at the time were only 2yrs. and 8 months old and my life was crazy.  Madi helped me with them so much, never complaining, so I did this Baking Party to thank her for all of her help.  

We first picked the colors for the party, she wanted Pink and Green.
This was the Invite... Recipe style


 I next made aprons for each of the party guests for them to use at the party and then to take home as a party favor to keep! Yes, it was a lot of sewing, but fun!

the aprons were folded  up and placed in a cute basket on the party table for the girls to pick from...

Once they had their aprons on, We had them make a flower from baking cups to embellish the side of their baking hats that I had  ready for the guests complete with their names on them…


The party table had several fun items on it…

Chocolate Dipped Strawberries... 


Decorated Water Bottles embellished with cupcake liners...


Thank You Sacks...


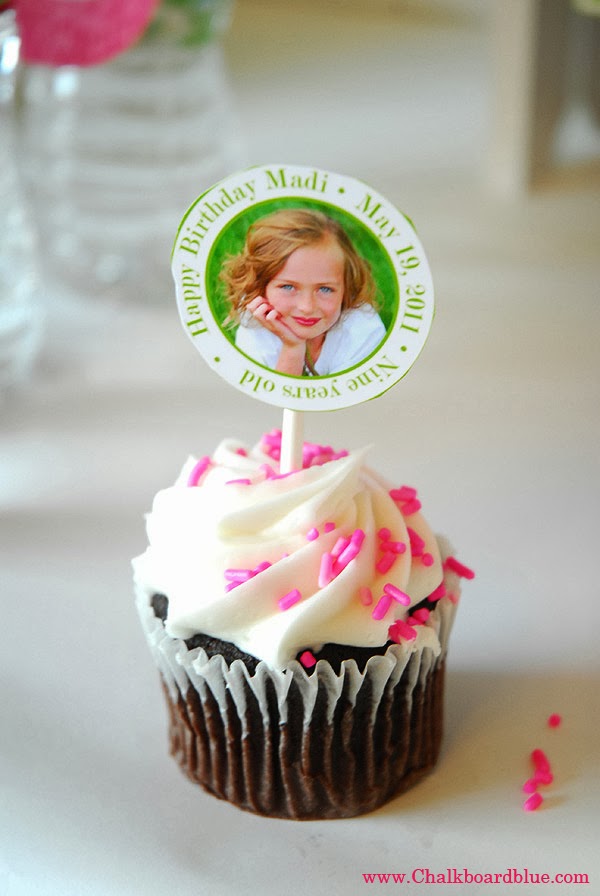
Cupcakes with Toppers that I designed...


These Cupcake toppers with her picture we actually took to her class to celebrate her birthday... 


Once the girls had their hats decorated, they got down to business dipping strawberries... 

and Decorating Cupcakes...


they played some other fun games and just had fun with each other… This is how the party table looked...


I also had some containers ready to go with customized labels on them for each girl to put her decorated items in to take home with her...


here are all of the containers loaded up and ready to go home with the guests...


this party was so fun to do and the girls had a blast!  Thanks for letting me share!

With Much Love & Gratitude,


Pin It

Wednesday, February 12, 2014

Valentine Cupcake toppers… Free Printable

 With Valentine's Day a couple days away, I wanted to share with you some cupcake toppers that you can print and use for Valentine Celebrations!


These are so fun by themselves or in a group!


Here is the printable for your Valentine toppers, just click on the download button…


If you would like to see how I made the Ombre Cupcakes I featured above, you can see that  HERE or by clicking on the photo below


xoxo


Monday, February 10, 2014

Confetti Kisses!

I just wanted to share with you some shots of the photoshoot I did of the Girls using Confetti! 

 How fun was This???  The girls LOVED throwing the confetti and it was so fun to capture them!  The pictures turned out fabulous and look so cute in their valentines!


I usually look for a different background to take my kid's pictures, but for this shoot I wanted the confetti to show up well so I used a plain white sheet.  I set it up close to a window where there was some great natural light


Used a paper punch and some different colored paper and let them play with it while I snapped away!


Loved the way they would react to the confetti…


I found the three that worked the best for each of them and made them into strips as if they were in a photo booth and printed them off and placed them behind their Kissing booth valentines.


If you missed the tutorial and free printable of the Kissing Booth valentine, you can see that HERE or by clicking on the photo below...


XOXO


Pin It

Wednesday, February 5, 2014

How to Decorate an Ombre Cupcake

I made some Ombre Cupcakes to kick off the month of February.  They turned out so fun, I wanted to share with you how I made them...

  
I baked the cupcakes and made some simple buttercream frosting.   I bought the large Wilton star tip a 1M.  I actually didn't want to change out my tips, so I just bought 3 of the 1M tips and put one in each of the 3 different colors of frosting.  

 I used red food coloring and made my 3 different shades of Pink frosting...


I took the darkest shade of pink and made a circle for the first layer…


I did the same with the next lighter shade of pink…


and used the lightest shade of pink to finish off the top…

They look so pretty when they are all together!


Enjoy!


If you would like to a tutorial on how to Decorate an Ombre Rosette Cake, you can see that HERE or by clicking on the photo below…


XOXO


Pin It
Related Posts Plugin for WordPress, Blogger...
 
09 10